使用表单
本节继续改进“打招呼”功能。不再使用 URL,而是通过表单向用户请求消息。
通过本教程,您将学习如何:
- 创建表单模型来表示用户通过表单输入的数据。
- 声明规则来验证输入的数据。
- 在视图中构建 HTML 表单。
安装表单包
要安装表单包,请在应用程序目录中执行以下命令:
composer require yiisoft/form-model对于 Docker,命令如下:
make composer require yiisoft/form-modelCreating a form
将从用户处请求的数据将由如下所示的 Form 类表示,并保存在文件 /src/Web/Echo/Form.php 中:
<?php

declare(strict_types=1);

namespace App\Web\Echo;

use Yiisoft\FormModel\FormModel;
use Yiisoft\Validator\Label;
use Yiisoft\Validator\Rule\Length;

final class Form extends FormModel
{
    #[Label('The message to be echoed')]
    #[Length(min: 2)]
    public string $message = '';
}在上面的示例中,Form 有一个单独的字符串属性 $message,其长度至少应为两个字符。该属性还有一个自定义标签。
Note: Validation attributes are Yii Validator rules. For common checks, first look for an existing rule. If a field also needs application-specific validation, use
Callbackfor that domain logic. With PHP attributes, use themethodoption because PHP attributes can't contain closures. For example, validate UUID syntax withUuid, then add#[Callback(method: 'validateUuidV7', skipOnError: true)]only when your domain specifically requires UUID version 7.
use Yiisoft\Validator\Result;
use Yiisoft\Validator\Rule\Callback;
use Yiisoft\Validator\Rule\Uuid;

#[Uuid(skipOnError: true)]
#[Callback(method: 'validateUuidV7', skipOnError: true)]
public string $id = '';

private function validateUuidV7(mixed $value): Result
{
    return \App\Support\Uuid::isVersion7($value)
        ? new Result()
        : (new Result())->addError('ID must be a UUID version 7.');
}
The callback method returns a Result: return an empty result when the value is valid or add an error when it isn't. The method body can call any validation code your application already uses, such as App\Support\Uuid::isValid($value, 'v7'). See Callback rule details for full examples and available method signatures.
For validation logic reused in several forms, create a custom Yii Validator rule and handler instead of copying callback methods. See the custom rule guide for the rule/handler structure.
Custom validation
Validation attributes are Yii Validator rules. For common checks, first look for an existing rule. For example, to validate a UUID string, use Uuid:
use Yiisoft\FormModel\FormModel;
use Yiisoft\Validator\Rule\Uuid;

final class Form extends FormModel
{
    #[Uuid]
    public string $id = '';
}
When a field needs application-specific validation that isn't covered by a built-in rule, use Callback. This is useful for one-off checks or for delegating to a domain/library method. With PHP attributes, use the method option because PHP attributes can't contain closures. For example, the following form validates a card number checksum:
<?php

declare(strict_types=1);

namespace App\Web\Echo;

use Yiisoft\FormModel\FormModel;
use Yiisoft\Validator\Label;
use Yiisoft\Validator\Result;
use Yiisoft\Validator\Rule\Callback;
use Yiisoft\Validator\Rule\Required;
use Yiisoft\Validator\ValidationContext;

final class Form extends FormModel
{
    #[Label('Card number')]
    #[Required]
    #[Callback(method: 'validateCardNumberChecksum', skipOnError: true)]
    public string $cardNumber = '';

    private function validateCardNumberChecksum(mixed $value, Callback $rule, ValidationContext $context): Result
    {
        if (!is_string($value)) {
            return (new Result())->addError('Card number must be a string.');
        }

        $digits = str_replace([' ', '-'], '', $value);

        if ($digits === '' || !ctype_digit($digits)) {
            return (new Result())->addError('Card number must contain digits only.');
        }

        $sum = 0;
        $double = false;

        foreach (array_reverse(str_split($digits)) as $digit) {
            $number = (int) $digit;

            if ($double) {
                $number *= 2;
                if ($number > 9) {
                    $number -= 9;
                }
            }

            $sum += $number;
            $double = !$double;
        }

        if ($sum % 10 !== 0) {
            return (new Result())->addError('Card number checksum is invalid.');
        }

        return new Result();
    }
}
The callback method returns a Result: return an empty result when the value is valid or add an error when it isn't. The method body can call any validation code your application already uses, such as App\Payment\CardNumber::hasValidChecksum($value).
For validation logic reused in several forms, create a custom Yii Validator rule and handler instead of copying callback methods. See the custom rule guide for the rule/handler structure.
Validating several fields together
Property attributes are enough when each field can be validated independently. When a rule depends on several fields, put a Callback rule on the form model class and attach an error to the field that should display it.
For example, a report filter may require the start date to be earlier than or equal to the end date:
<?php

declare(strict_types=1);

namespace App\Web\Report;

use DateTimeImmutable;
use Yiisoft\FormModel\FormModel;
use Yiisoft\Validator\Result;
use Yiisoft\Validator\Rule\Callback;
use Yiisoft\Validator\Rule\Date\Date;
use Yiisoft\Validator\Rule\Required;
use Yiisoft\Validator\ValidationContext;

#[Callback(method: 'validateDateRange')]
final class ReportFilterForm extends FormModel
{
    #[Required]
    #[Date(format: 'php:Y-m-d')]
    public string $dateFrom = '';

    #[Required]
    #[Date(format: 'php:Y-m-d')]
    public string $dateTo = '';

    public function validateDateRange(mixed $value, Callback $rule, ValidationContext $context): Result
    {
        $result = new Result();

        if ($this->dateFrom === '' || $this->dateTo === '') {
            return $result;
        }

        $dateFrom = $this->parseDate($this->dateFrom);
        $dateTo = $this->parseDate($this->dateTo);

        if ($dateFrom === null || $dateTo === null) {
            return $result;
        }

        if ($dateFrom > $dateTo) {
            $result->addError('The start date must be earlier than or equal to the end date.', [], ['dateFrom']);
        }

        return $result;
    }

    private function parseDate(string $value): ?DateTimeImmutable
    {
        $date = DateTimeImmutable::createFromFormat('!Y-m-d', $value);
        $errors = DateTimeImmutable::getLastErrors();

        if ($date === false || ($errors !== false && ($errors['warning_count'] > 0 || $errors['error_count'] > 0))) {
            return null;
        }

        return $date;
    }
}
The class-level Callback receives the whole object as $value, but using $this is usually clearer in a form model method. Returning an empty Result means the cross-field rule passed. The third argument of addError() is the value path; ['dateFrom'] makes the error appear on the dateFrom field when rendering the form.
Using the form
现在您有了一个表单,在“打招呼”中的操作中使用它。
以下是 /src/Web/Echo/Action.php 中的最终结果:
<?php

declare(strict_types=1);

namespace App\Web\Echo;

use Psr\Http\Message\ResponseInterface;
use Psr\Http\Message\ServerRequestInterface;
use Yiisoft\FormModel\FormHydrator;
use Yiisoft\Yii\View\Renderer\WebViewRenderer;

final readonly class Action
{
    public function __construct(
        private WebViewRenderer $viewRenderer,
        private FormHydrator $formHydrator,
    ) {}

    public function __invoke(ServerRequestInterface $request): ResponseInterface
    {
        $form = new Form();

        $this->formHydrator->populateFromPostAndValidate($form, $request);

        return $this->viewRenderer->render(__DIR__ . '/template', [
            'form' => $form,
        ]);
    }
}
您不再从路由中读取数据,而是从请求的 POST 数据填充表单,并借助 FormHydrator 进行验证。然后将表单传递给视图。
为使表单正常工作,我们需要同时允许 GET(用于渲染表单)和 POST(用于发送数据)。调整 config/common/routes.php 中的路由:
<?php

declare(strict_types=1);

use App\Web;
use Yiisoft\Http\Method;
use Yiisoft\Router\Group;
use Yiisoft\Router\Route;

return [
    Group::create()
        ->routes(
            Route::get('/')
                ->action(Web\HomePage\Action::class)
                ->name('home'),
            Route::methods([Method::GET, Method::POST], '/say')
                ->action(Web\Echo\Action::class)
                ->name('echo/say'),
        ),
];
调整视图
要渲染表单,您需要修改视图 src/Web/Echo/template.php:
<?php
use App\Web\Echo\Form;
use Yiisoft\FormModel\Field;
use Yiisoft\Html\Html;
use Yiisoft\Router\UrlGeneratorInterface;
use Yiisoft\Yii\View\Renderer\Csrf;

/**
 * @var Form $form
 * @var string[] $errors
 * @var UrlGeneratorInterface $urlGenerator
 * @var Csrf $csrf
 */

$htmlForm = Html::form()
    ->post($urlGenerator->generate('echo/say'))
    ->csrf($csrf);
?>

<?= $htmlForm->open() ?>
    <?= Field::text($form, 'message')->required() ?>
    <?= Html::submitButton('Say') ?>
<?= $htmlForm->close() ?>

<?php if ($form->isValid()): ?>
    Echo said: <?= Html::encode($form->message) ?>
<?php endif ?>
如果表单有效,则显示消息。其余部分初始化并渲染表单。
首先,您使用 POST 类型和借助 URL 生成器生成的操作 URL 初始化 $htmlForm。您可以在所有视图中以 $urlGenerator 访问它。您还需要将 CSRF 令牌传递给表单,由于 config/common/params.php 中列出的视图注入,它也可以在每个视图中以 $csrf 的形式访问:
'yiisoft/yii-view-renderer' => [
    'injections' => [
        Reference::to(CsrfViewInjection::class),
    ],
],
模板将 CSRF 令牌值渲染为隐藏输入,以确保请求来自表单页面而非其他网站。它将与 POST 表单数据一起提交。省略它将导致 HTTP 响应码 422。
您使用 Field::text() 输出“message”字段,它会负责填充值、转义、渲染字段标签和验证错误。
现在,如果您提交空消息,将会收到验证错误:“要回显的消息必须至少包含 2 个字符。”
Trying it Out
要查看其工作原理,请使用浏览器访问以下 URL:
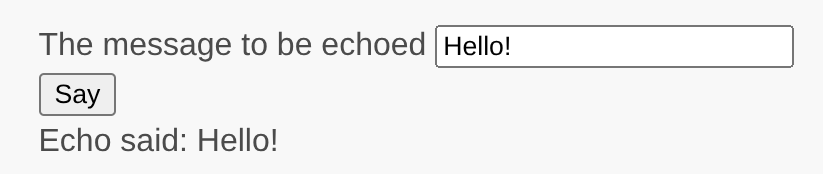
http://localhost:8080/say您将看到一个包含表单输入字段和标签的页面,标签指示要输入什么数据。此外,表单有一个标有“Say”的“提交”按钮。如果您不输入任何内容就点击“提交”按钮,将看到该字段是必填的。如果您输入单个字符,表单会在有问题的输入字段旁边显示错误消息。

在您输入有效消息并点击“提交”按钮后,页面将回显您输入的数据。
总结
在本指南的这一节中,您已学习了如何创建表单模型类来表示用户数据并验证该数据。
您还学习了如何从用户获取数据以及如何在浏览器中显示数据。这是开发应用程序时可能花费大量时间的任务,但 Yii 提供了强大的小部件来使这项任务变得容易。
在下一节中,您将学习如何使用数据库,这在几乎每个应用程序中都是必需的。